Improving visual perception of edge devices
LiPo batteries (lithium polymer batteries) and embedded processors are a boon to the Internet of Things (IoT) market. They have enabled IoT device manufacturers to pack more features and functionalities into mobile edge devices, while still providing a long runtime on a single charge. The advancement in sensor technology, especially vision-based sensors, and software algorithms that process large amount of data generated by these sensors has spiked the need for better computational performance without compromising on battery life or real-time performance of these mobile edge devices.
The Intel® Movidius™ Visual Processing Unit (Intel® Movidius™ VPU) provides real-time visual computing capabilities to battery-powered consumer and industrial edge devices such as Google Clips, DJI® Spark drone, Motorola® 360 camera, HuaRay® industrial smart cameras, and many more. In this article, we won’t replicate any of these products, but we will build a simple handheld device that uses deep neural networks (DNN) to recognize objects in real-time.
| Image may be NSFW. Clik here to view. 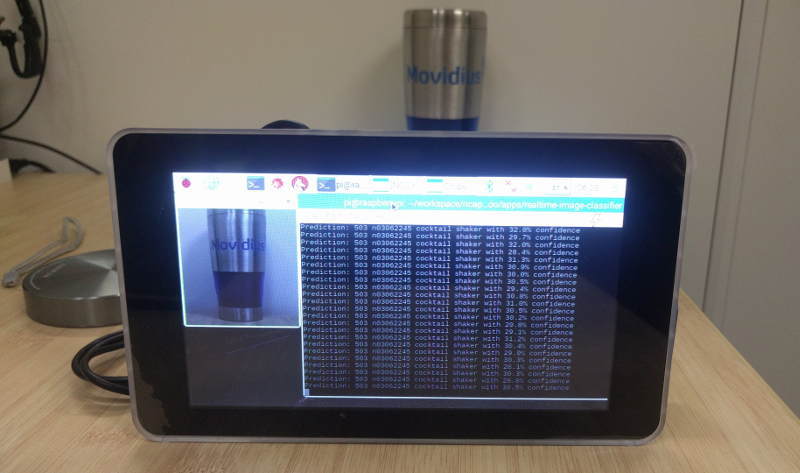 |
|---|
| The project in action |
Practical learning!
You will build…
A battery-powered DIY handheld device, with a camera and a touch screen, that can recognize an object when pointed toward it.
You will learn…
- How to create a live image classifier using Raspberry Pi* (RPi) and the Intel® Movidius™ Neural Compute Stick (Intel® Movidius™ NCS)
You will need…
- An Intel Movidius Neural Compute Stick - Where to buy
- A Raspberry Pi 3 Model B running the latest Raspbian* OS
- A Raspberry Pi camera module
- A Raspberry Pi touch display
- A Raspberry Pi touch display case [Optional]
- Alternative option - Pimoroni® case on Adafruit
If you haven’t already done so, install the Intel Movidius NCSDK on your RPi either in full SDK or API-only mode. Refer to the Intel Movidius NCS Quick Start Guide for full SDK installation instructions, or Run NCS Apps on RPi for API-only.
Fast track…
If you would like to see the final output before diving into the detailed steps, download the code from our sample code repository and run it.
mkdir -p ~/workspace
cd ~/workspace
git clone https://github.com/movidius/ncappzoo
cd ncappzoo/apps/live-image-classifier
make run
The above commands must be run on a system that runs the full SDK, not just the API framework. Also make sure a UVC camera is connected to the system (a built-in webcam on a laptop will work).
You should see a live video stream with a square overlay. Place an object in front of the camera and align it to be inside the square. Here’s a screenshot of the program running on my system.
Let’s build the hardware
Here is a picture of how the hardware setup turned out:
Image may be NSFW.
Clik here to view.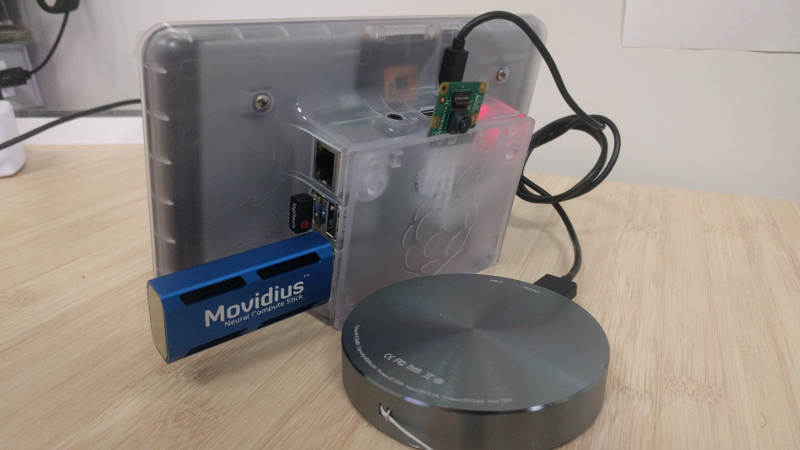
Step 1: Display setup
Touch screen setup: follow the instructions on element14’s community page.
Rotate the display: Depending on the display case or stand, your display might appear inverted. If so, follow these instructions to rotate the display 180°.
sudo nano /boot/config.txt
# Add the below line to /boot/config.txt and hit Ctrl-x to save and exit.
lcd_rotate=2
sudo reboot
Skip step 2 if you are using a USB camera.
Step 2: Camera setup
Enable CSI camera module: follow instructions on the official Raspberry Pi documentation site.
Enable v4l2 driver: For reasons unknown, Raspbian does not load V4L2 drivers for CSI camera modules by default. The example script for this project uses OpenCV-Python, which in turn uses V4L2 to access cameras (via /dev/video0), so we will have to load the V4L2 driver.
sudo nano /etc/modules
# Add the below line to /etc/modules and hit Ctrl-x to save and exit.
bcm2835-v4l2
sudo reboot
Let’s code
Being a big advocate of code reuse, so most of the Python* script for this project has been pulled from this previous article, ‘Build an image classifier in 5 steps’. The main difference is that we have moved each ‘step’ (sections of the script) into its own function.
The application is written in such a way that you can run any classifier neural network without having to make much change to the script. The following are a few user-configurable parameters:
GRAPH_PATH: Location of the graph file, against which we want to run the inference- By default it is set to
~/workspace/ncappzoo/tensorflow/mobilenets/graph
- By default it is set to
CATEGORIES_PATH: Location of the text file that lists out labels of each class- By default it is set to
~/workspace/ncappzoo/tensorflow/mobilenets/categories.txt
- By default it is set to
IMAGE_DIM: Dimensions of the image as defined by the choosen neural network- ex. MobileNets and GoogLeNet use 224x224 pixels, AlexNet uses 227x227 pixels
IMAGE_STDDEV: Standard deviation (scaling value) as defined by the choosen neural network- ex. GoogLeNet uses no scaling factor, MobileNet uses 127.5 (stddev = 1/127.5)
IMAGE_MEAN: Mean subtraction is a common technique used in deep learning to center the data- For ILSVRC dataset, the mean is B = 102 Green = 117 Red = 123
Before using the NCSDK API framework, we have to import mvncapi module from mvnc library:
import mvnc.mvncapi as mvncIf you have already gone through the image classifier blog, skip steps 1, 2, and 5.
Step 1: Open the enumerated device
Just like any other USB device, when you plug the NCS into your application processor’s (Ubuntu laptop/desktop) USB port, it enumerates itself as a USB device. We will call an API to look for the enumerated NCS device, and another to open the enumerated device.
# ---- Step 1: Open the enumerated device and get a handle to it -------------
def open_ncs_device():
    # Look for enumerated NCS device(s); quit program if none found.
    devices = mvnc.EnumerateDevices()
    if len( devices ) == 0:
        print( 'No devices found' )
        quit()
    # Get a handle to the first enumerated device and open it.
    device = mvnc.Device( devices[0] )
    device.OpenDevice()
    return device
Step 2: Load a graph file onto the NCS
To keep this project simple, we will use a pre-compiled graph of a pre-trained GoogLeNet model, which was downloaded and compiled when you ran make inside the ncappzoo folder. We will learn how to compile a pre-trained network in another blog, but for now let’s figure out how to load the graph into the NCS.
# ---- Step 2: Load a graph file onto the NCS device -------------------------
def load_graph( device ):
    # Read the graph file into a buffer.
    with open( GRAPH_PATH, mode='rb' ) as f:
        blob = f.read()
    # Load the graph buffer into the NCS.
    graph = device.AllocateGraph( blob )
    return graph
Step 3: Pre-process frames from the camera
As explained in the image classifier article, a classifier neural network assumes there is only one object in the entire image. This is hard to control with a LIVE camera feed, unless you clear out your desk and stage a plain background. In order to deal with this problem, we will cheat a little bit. We will use OpenCV API to draw a virtual box on the screen and ask the user to manually align the object within this box; we will then crop the box and send the image to NCS for classification.
# ---- Step 3: Pre-process the images ----------------------------------------
def pre_process_image():
    # Grab a frame from the camera.
    ret, frame = cam.read()
    height, width, channels = frame.shape
    # Extract/crop frame and resize it.
    x1 = int( width / 3 )
    y1 = int( height / 4 )
    x2 = int( width * 2 / 3 )
    y2 = int( height * 3 / 4 )
    cv2.rectangle( frame, ( x1, y1 ) , ( x2, y2 ), ( 0, 255, 0 ), 2 )
    cv2.imshow( 'NCS real-time inference', frame )
    cropped_frame = frame[ y1 : y2, x1 : x2 ]
    cv2.imshow( 'Cropped frame', cropped_frame )
    # Resize image [image size if defined by chosen network during training].
    cropped_frame = cv2.resize( cropped_frame, IMAGE_DIM )
    # Mean subtraction and scaling [a common technique used to center the data].
    cropped_frame = cropped_frame.astype( numpy.float16 )
    cropped_frame = ( cropped_frame - IMAGE_MEAN ) * IMAGE_STDDEV
    return cropped_frame
Step 4: Offload an image/frame onto the NCS to perform inference
Thanks to the high-performance and low-power consumption of the Intel Movidius VPU, which is in the NCS, the only thing that Raspberry Pi has to do is pre-process the camera frames (step 3) and shoot it over to the NCS. The inference results are made available as an array of probability values for each class. We can use argmax() to determine the index of the top prediction and pull the label corresponding to that index.
# ---- Step 4: Offload images, read and print inference results ----------------
def infer_image( graph, img ):
    # Read all categories into a list.
    categories = [line.rstrip('\n') for line in
                   open( CATEGORIES_PATH ) if line != 'classes\n']
    # Load the image as a half-precision floating point array.
    graph.LoadTensor( img , 'user object' )
    # Get results from the NCS.
    output, userobj = graph.GetResult()
    # Find the index of highest confidence.
    top_prediction = output.argmax()
    # Print top prediction.
    print( "Prediction: " + str(top_prediction)
           + "" + categories[top_prediction]
           + " with %3.1f%% confidence" % (100.0 * output[top_prediction] ) )
    return
If you are interested to see the actual output from NCS, head over to
ncappzoo/apps/image-classifier.pyand make this modification:
# ---- Step 4: Read and print inference results from the NCS -------------------
# Get the results from NCS.
output, userobj = graph.GetResult()
# Print output.
print( output )
...
# Print top prediction.
for i in range( 0, 4 ):
    print( "Prediction " + str( i ) + ": " + str( order[i] )
           + " with %3.1f%% confidence" % (100.0 * output[order[i]] ) )
...
When you run this modified script, it will print out the entire output array. Here’s what you will get when you run an inference against a network that has 37 classes, notice the size of the array is 37 and the top prediction (73.8%) is in the 30th index of the array (7.37792969e-01).
[  0.00000000e+00   2.51293182e-04   0.00000000e+00   2.78234482e-04
   0.00000000e+00   2.36272812e-04   1.89781189e-04   5.07831573e-04
   6.40749931e-05   4.22477722e-04   0.00000000e+00   1.77288055e-03
   2.31170654e-03   0.00000000e+00   8.55255127e-03   6.45518303e-05
   2.56919861e-03   7.23266602e-03   0.00000000e+00   1.37573242e-01
   7.32898712e-04   1.12414360e-04   1.29342079e-04   0.00000000e+00
   0.00000000e+00   0.00000000e+00   6.94580078e-02   1.38878822e-04
   7.23266602e-03   0.00000000e+00   7.37792969e-01   0.00000000e+00
   7.14659691e-05   0.00000000e+00   2.22778320e-02   9.25064087e-05
   0.00000000e+00]
Prediction 0: 30 with 73.8% confidence
Prediction 1: 19 with 13.8% confidence
Prediction 2: 26 with 6.9% confidence
Prediction 3: 34 with 2.2% confidence
Step 5: Unload the graph and close the device
In order to avoid memory leaks and/or segmentation faults, we should close any open files or resources and deallocate any used memory.
# ---- Step 5: Unload the graph and close the device -------------------------
def close_ncs_device( device, graph ):
    cam.release()
    cv2.destroyAllWindows()
    graph.DeallocateGraph()
    device.CloseDevice()
    return
Congratulations! You just built a DNN-based live image classifier.
The following pictures are of this project in action
| Image may be NSFW. Clik here to view. 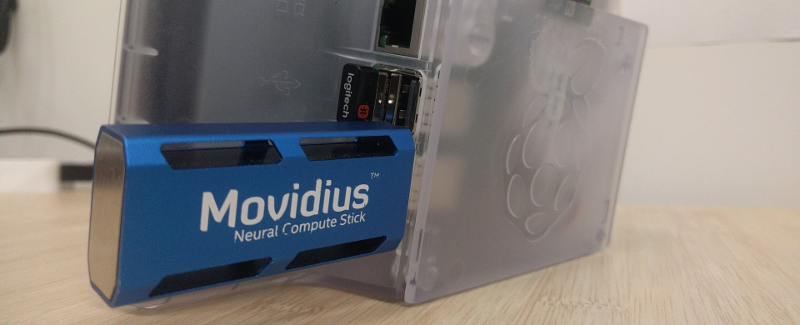 |
|---|
| NCS and a wireless keyboard dongle plugged directly to RPI. |
| Image may be NSFW. Clik here to view. 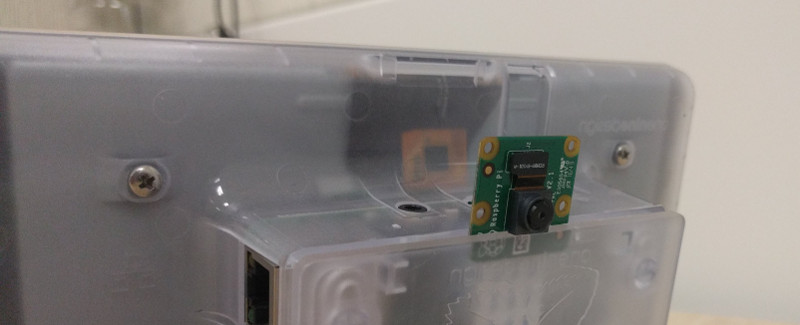 |
|---|
| RPi camera setup |
| Image may be NSFW. Clik here to view. 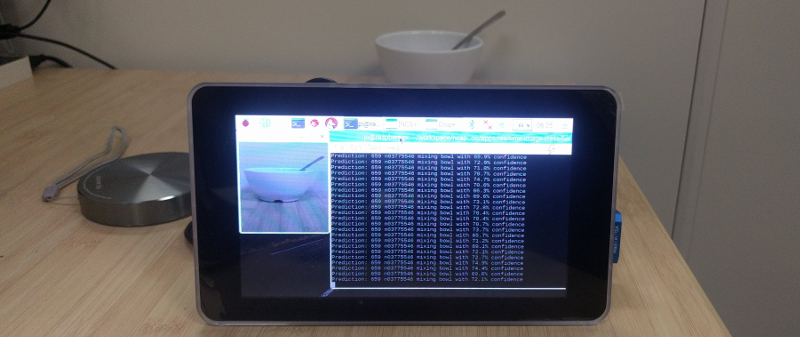 |
|---|
| Classifying a bowl |
| Image may be NSFW. Clik here to view. 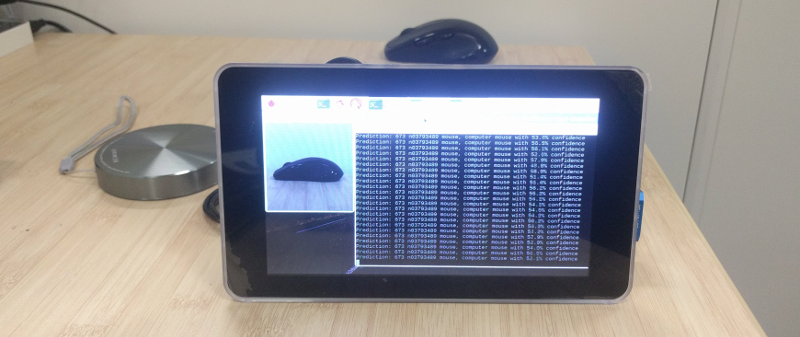 |
|---|
| Classifying a computer mouse |
Further experiments
- Port this project onto a headless system like RPi Zero* running Raspbian Lite*.
- This example script uses MobileNets to classify images. Try flipping the camera around and modifying the script to classify your age and gender.
- Hint: Use graph files from ncappzoo/caffe/AgeNet and ncappzoo/caffe/GenderNet.
- Convert this example script to do object detection using ncappzoo/SSD_MobileNet or Tiny YOLO.
Further reading
- @wheatgrinder, an NCS community member, developed a system where live inferences are hosted on a local server, so you can stream it through a web browser.
- Depending on the number of peripherals connected to your system, you many notice throttling issues as mentioned by @wheatgrinder in his post. Here’s a good read on how he fixed the issue.